
 I hope everyone had a wonderful Easter/Passover/Ostara, etc.
We have been super busy at our house this month. Still going through things and paring down on stuff, still in school (only one month left for me, yay!), watching my niece a few days a week, and trying to keep up with the normal housework, as well as the added work of a garden! whew!
I had planned to make these DIY “paper” towels for ages, and finally squeezed in a few moments to start working on them. I thought it was a simple enough idea to reduce the amount of waste our household expels! In the long run these towels will be extremely cost-effective for our family as well! Even if you buy the cheap paper towels at the store, the roll really doesn’t last that long, and they tend to be very thin and not very absorbent. So you go through them fast. These towels provide more absorbency, are much better for the environment, and keeping the piles down at landfills!
Ok, let’s get down to the details!
What you’ll need:
- 1 fat quarters fabric bundle (These are about 18″x 21″)
- 2 old bath towels
- tape measure or see-through sewing ruler
- washable marking pen
- scissors or rotary cutter
- cutting mat (if using a rotary cutter)
- thread
- Kam snaps
- sewing machine or serger
- A snap press (they make handheld, or the heavy duty tabletop press; in this project I used a tabletop press)
Directions:
- Wash and dry your fabric and wash your towels. This is important as most new cotton fabric shrinks in the wash and dryer.
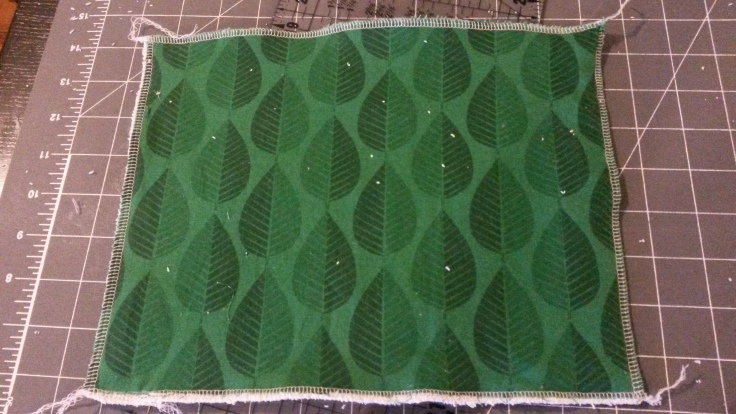
- Measure your fabric squares; cut them in half. Set aside.


- Lay out one bath towel and measure; you should gauge how many towels you can cut out of it that will match the size of your fabric squares. I was able to get 10 towels out of one bath towel. I used the marking pen to make my lines of where the cuts needed to be made.
- I lined up the see-through sewing ruler with my lines and used a rotary cutter on a mat to make the cuts.


- Once all of your pieces are cut, pin the fabric to towels.
- Using a serger, simply run the ends through to sew the towels together. If using a sewing machine, I recommend making a straight stitch the entire way around, and then a zig-zag or your preferred finishing stitch on the edges. I was lazy and didn’t trim off the excess threads yet, but you’ll want to tie off and trim. 😉
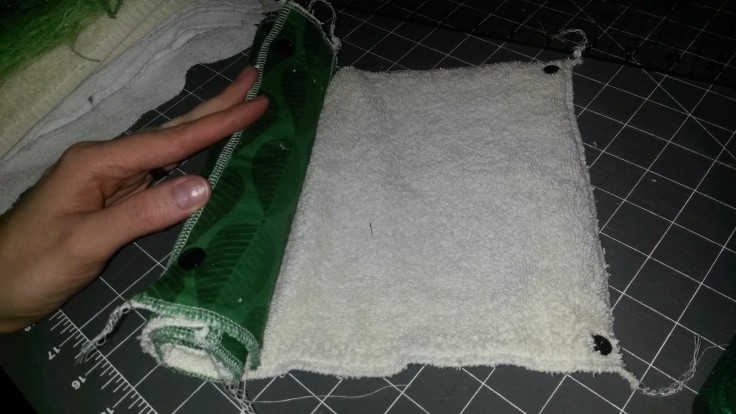
- Snaps! Please make a mental note to be aware of which sides you put the caps, sockets and studs on. You have to make sure that there are sockets on one end, then the studs on the opposite end, but on the back side of the towel. We want these towels to snap onto each other to create a functioning roll! To reduce bunching, I alternated snap placement on every other towel. (see photos)


- Last, snap all of your towels together and make your roll! You should have approximately 20 “paper” towels. (I only show 2/20 for this tutorial, but I doubled the amount of towels so I have 40 total!)
I haven’t determined how to set up my towel roll yet, I’m thinking either on a cardboard paper towel roll to use our holder, or I may make a box with a slot to make them more hidden. What do you think I should use??
Keep a bin or bucket to toss the dirty towels in and wash as needed. I tend to wash the really dirty stuff every other day in the summer, to keep the smells down.
I know reusable towels may not be for everyone, but we are fortunate to live in an area where we have fairly inexpensive water, and we have a line to hang dry our laundry outside! It saves SO much money in the spring and summer! And I love that line-dried smell.
Are you interested in making your own reusable “paper” towels? What other eco-friendly items have you made? Please comment below!

April 18, 2017 at 4:39 pm
Very clear and simple instructions! I have seen these before and wanted to make some but previous instructions I’ve looked at didn’t use towelling and they didn’t seem to be that absorbent so I didn’t see the point but after reading yours I will be off to search for an old towel this evening! It would be a great project to use up large off cuts as well and would add so much colour to your kitchen!
LikeLike
April 18, 2017 at 5:57 pm
Thank you! Yes, you can definitely use any cotton fabric, fabric napkins, old sheets, etc. to repurpose for this project as well. Here’s to being kinder to the environment!
LikeLike
April 18, 2017 at 8:43 pm
What a great idea
LikeLike
April 20, 2017 at 7:04 pm
Great idea x
LikeLike
April 21, 2017 at 4:05 am
Wow! What a great idea. Never thought about this.
LikeLike
April 22, 2017 at 5:40 pm
All I need is the snaps and I can totally make these. I like the idea of putting them in a box with a slot in them. Thank you for sharing with me!
LikeLiked by 1 person
April 27, 2017 at 2:23 pm
You’re welcome! A really cheap place to get snaps is diapersewingsupplies.com.
LikeLike